Ming3D Game engine project

Ming3D game engine project
Introduction
I’ve been interested in game engines for a long time. As soon as I started studying programming at the university, I was curious about how game engines are made. So quite naturally, I decided to try to make my own game engine, a few years ago.
Of course, making a game engine is a lot of work, and I think it would be over-ambitious for me to aim at making something that will be more useful than existing game engines, such as Godot, Unity, Unreal etc. The goal of this project mostly been for me to learn about game engine development and especially 3D rendering. I only work on it in short periods, and it has become some kind of learning sandbox that I use from time to time.
The engine
The engine is currently hosted on GitHub. I’m planning to move it to Codeberg, as soon as CI support is ready. It’s written in C++.
I’ve taken a lot of inspiration from other engines. Especially:
- Genesis3D: https://github.com/Genesis-3D/Genesis-3D (discontinued)
- Unreal Engine 4: https://www.unrealengine.com
If you’re new to game engine development, I would strongly recommend to take a look at the Genesis3D source code, even though its incomplete and discontinued (long ago). Compared to other game engines, the source code is much more intuitive and beginner friendly. It’s targeting older rendering APIs and has a few design flaws in terms of performance, but the code is very readable and could be a great place to start to learn about game engines, and especially 3D rendering in game engines.
Features
Ming3D is still very much work in progress, however it already has quite a few features (some are WIP):
- Cross platform (Linux and Windows)
- Multiple rendering APIs: OpenGL and D3D11
- A cross-platform shader language (Similar to Unity. The shaders are automatically converted to GLSL/HLSL)
- Rendering to multiple windows
- Physics, using NVIDIA PhysX (lacks some features, and not that well tested yet)
- Networking (WIP. Has support for RPCs and variable replication)
- WIP: GUI system (currently not in main branch)
Code architecture
The engine uses an Actor and Component based hierarchy. You can create actors and add built-in components (such as MeshComponent, BoxColliderComponent and CameraComponent) or create your own custom components.
Internally in the engine, there are “Manager” classes for the various engine subsystems:
TimeManager(for getting the time)PhysicsManagerInputManager(for gamepad/mouse/keyboard input)
Many classes inherit from the Object base class. By inheriting from this class and using the DEFINE_CLASS and IMPLEMENT_CLASS, you can add RTTI/reflection support to your classes. This can be useful for:
- Serialisation
- Networking (RPCs require this, as they search for functions by name).
See this networking sample for an example.
Rendering
The renderer uses several layers of abstractions. The lowest layer is the RenderDevice class, which abstracts the various rendering commands you might need, such as vertex buffer creation, texture creation, drawing, etc. Each rendering API has its own subclass of this (see RenderDeviceGL and RenderDeviceD3D11). Many of its functions will return instances of other abstracted rendering classes, such as VertexBuffer and ConstantBuffer.
While you can use the RenderDevice directly to do low-level rendering, you will typically create actors with MeshComponents attached to them The SceneRenderer and ForwardRenderPipeline (we currently only have a forward renderer) classes are responsible for rendering the whole actor hierarchy. You can see the implementation details in forward_render_pipeline.cpp. It does the following:
- Setup light info
- Render shadow map (if shadows are enabled)
- Collect objects to render
- Render opaque geometry
- Render transparent geometry
void ForwardRenderPipeline::Render(const RenderPipelineContext& context, RenderPipelineParams& params)
{
    if (params.mCamera->mRenderTarget == nullptr)
        return;

    SetupMainLight(context);

    if(context.mMainLight != nullptr && context.mMainLight->mShadowType != EShadowType::None)
    {
        // set light projection matrix
        context.mMainLight->mLightCamera->mProjectionMatrix = glm::ortho(-15.0f, 15.0f, -15.0f, 15.0f, -50.1f, 50.0f);

        // set light view matrix
        glm::vec3 lightDir = glm::normalize(context.mMainLight->mLightMat * glm::vec4(0.0f, 0.0f, -1.0f, 0.0f));
        glm::vec3 lookTarget = glm::inverse(context.mMainCamera->mCameraMatrix) * glm::vec4(0.0f, 0.0f, 0.0f, 1.0f);
        glm::vec3 lightpos = lookTarget - lightDir; // TODO
        context.mMainLight->mLightCamera->mCameraMatrix = glm::lookAt(lightpos, lookTarget, glm::vec3(0.0f, 0.0f, 1.0f));

        CollectVisibleObjects(context, *context.mMainLight->mLightCamera->mRenderPipelineParams);
        SetupNodeIndices(*context.mMainLight->mLightCamera->mRenderPipelineParams);

        GGameEngine->GetRenderDevice()->BeginRenderTarget(context.mMainLight->mLightCamera->mRenderTarget);
        RenderObjects(*context.mMainLight->mLightCamera->mRenderPipelineParams, ERenderType::Opaque, nullptr);
        GGameEngine->GetRenderDevice()->EndRenderTarget(context.mMainLight->mLightCamera->mRenderTarget);
    }

    // set camera projection matrix
    WindowBase* window = GGameEngine->GetMainWindow(); // TODO
    params.mCamera->mProjectionMatrix = glm::perspective<float>(glm::radians(45.0f), (float)window->GetWidth() / (float)window->GetHeight(), 0.1f, 1000.0f);

    CollectVisibleObjects(context, params);
    SetupNodeIndices(params);

    GGameEngine->GetRenderDevice()->BeginRenderTarget(params.mCamera->mRenderTarget);
    RenderObjects(params, ERenderType::Opaque, context.mMainLight);
    RenderObjects(params, ERenderType::Transparent, context.mMainLight);
    GGameEngine->GetRenderDevice()->EndRenderTarget(params.mCamera->mRenderTarget);
}
The renderer is still single threaded, and I’m hoping to find time to improve it later.
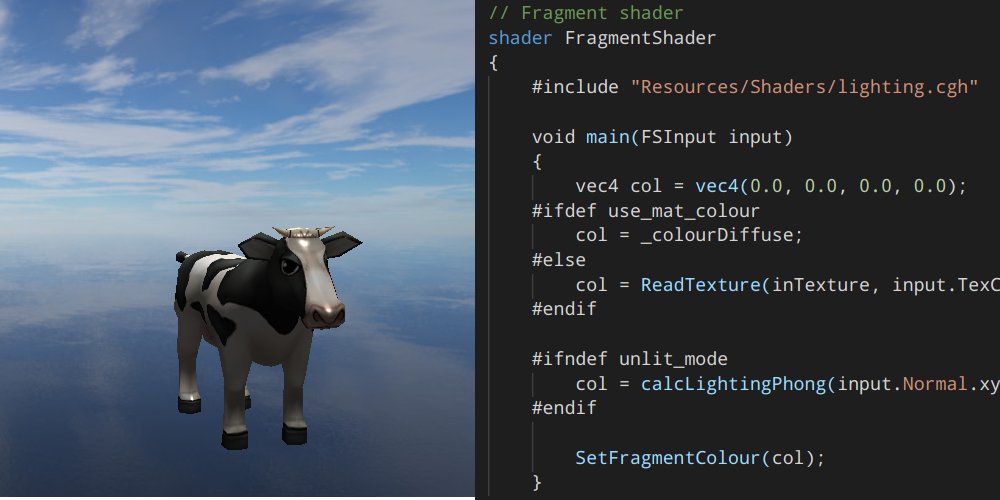
Shader language
I’ve made my own shader language for this engine. The shaders get parsed by the ShaderParser and converter by one of the ShaderWriters.
By making my own shader language that I parse and convert, I get the following advantages:
- Ability to support various rendering APIs, such as OpenGL, DirectX and Vulkan.
- By parsing the shaders, the engine gains knowledge of its shaders. This can be used to detect the vertex layout supported by a shader, and for checking which shader constant buffers / uniforms are available.
- I can create multiple variants of the same shader, with different preprocessor definitions to enable/disable different features.
Much of this can of course be done without re-inventing the wheel, but it was a fun challenge!
For an example of a shader, see the default shader.
Future work
There is still a lot of work left to do, and plenty for me to learn. These are some of the tings I’m hoping to finish this year:
- GUI system (currently WIP: You can create widgets in widget files, but there is not yet any input handling, and it lacks many widget types)
- Audio system
- More complete and interesting sample projects
Sharing is caring!